It's me again ! Here we go for another new lesson - Layering !
To be honest, I'm not so sure about layering as mine is real simple . I have no idea whether i applied all I learn or i just play with the "on" and "off" button. Hopefully my lecturer accepts my hard work . Already did it for more than 3 hours :(
Well, i had already finalize all the photos that I would like to use for my eWallpaper. I took some photos from the previous selection and I added in 2 new photos to enhance the design of the wallpaper. As usual , i selected the part that I wanted and needed for my wallpaper. Below is my final selection.
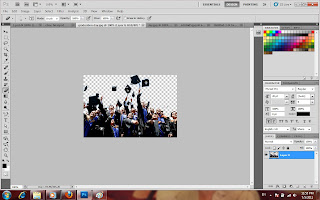 |
| Selection of the photo |
|
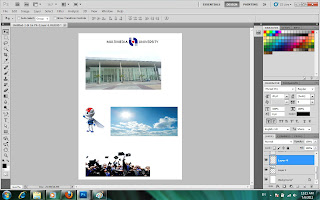 |
| final selection for my eWallpaper |
|
|
After doing the selection, i combined all of the photos into a complete form by adjusting the colour and position. Firstly, open a new page. A dialogue box appear and adjust the size of the paper from clipboard into international paper (A4). Next, i select one of the photo as the background photo.
 |
| Selecting International Paper (A4) | | |
|
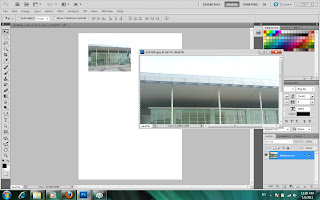 |
| Selecting the background |
After selecting the background, go to
"edit", click on
"free transform" to adjust the size of the image. You can also click on the shortcut button on the keyboard which is
"ctrl+t". Adjust the photo according to your own preference. As for me , i would like it to fit the screen since it's my background photo.
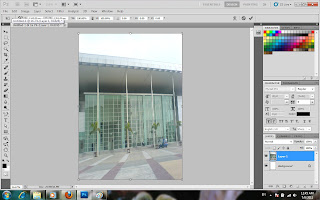 |
| The background of my eWallpaper |
|
The next step is to combine another photo. I felt that the sky is a little too dull for me . Therefore, I decided to change the colour of the sky by adding in another photo into it . By adding in another photo, I create a new layer. Double click on the layer to rename the layer.
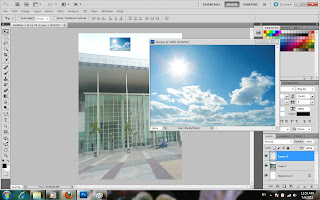 |
| Combining the sky into the background. |
|
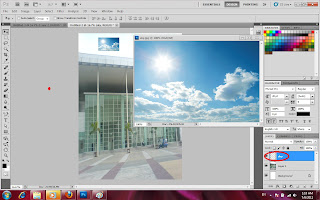 |
| renaming the layer from layer 2 to sky |
Click
"ctrl+t" to adjust the size of the sky as well as the position. Move the cursor to get the your most desired position. When you're satisfied with the position, double click on the mouse to exit transform.
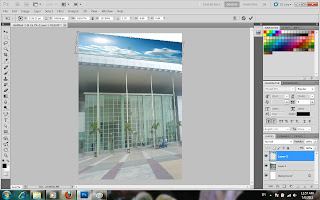 |
| Adjusting the size and position of the sky to replace the original one |
|
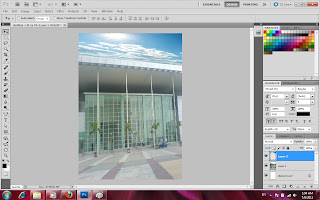 |
| Done adjusting the position. After transformation |
|
After adjusting the transformation, look at the overall picture to get satisfaction. I'm not satisfies with the colour. The sky is a little too dark. I would like to adjust the colour tone. To change the colour tone, go to
"image", then click on
"adjustments" and then select
"levels". The shortcut buttons for this demand is
"ctrl+L". A dialogue box written "levels" will appear. Move the cursor to adjust the output level for the desired colour of the image.
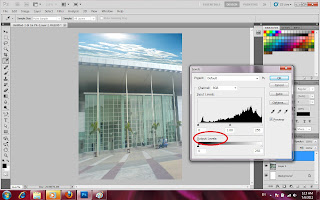 |
| Adjusting the colour tone by adjusting the output levels |
|
Next, we will move on by combining the Multimedia University logo. Rename the layer as
Logo. Open the MMU logo . Click on
"magic wand" to select on the photo . Make sure that the photo is in dotted line. After that, click to the
"move tool" to move the selected into the main artwork. Press and hold
"ctrl+T" to transform the photo.
 |
| Adding Multimedia University logo into the artwork |
|
Let's continue by combining Ebee and the graduates photo. Rename each of the layers to avoid confusion. Repeat the same steps as above. Open the photo, click on
"magic wand" to select the photo, click on
"move tool" and drag the photo to the main artwork. After dragging in the photo, click
"ctrl+T" on the keyboard to transform, which means to adjust the size and position.
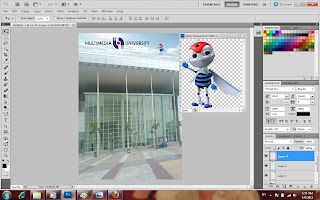 |
| Combining Ebee into the artwork |
 |
| combining graduates into the main artwork |
|
 |
| My artwork after combining the images :) |
|
Next, we will add in some words for this artwork. Since this is a eWallpaper for an open day, details are vital for readers. Not all readers will be able to understand it by just looking at those pictures in the eWallpaper. Now, we will use the
"horizontal type tool" to key in words into the eWallpaper.
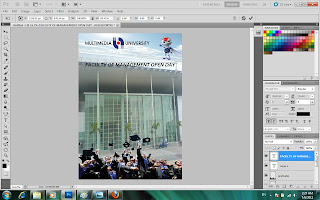 |
| Type in "Faculty of Management Open Day" using "text tool" |
I'm thinking that my eWallpaper is still lacking of information. Therefore, I add in all the necessary information using the same tool which is
"horizontal text tool". Besides that, you can also adjust the font, colours and size of your wording. Observe the below picture.
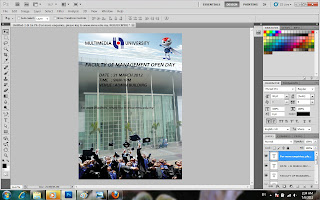 |
| Adding in text to the artwork |
|
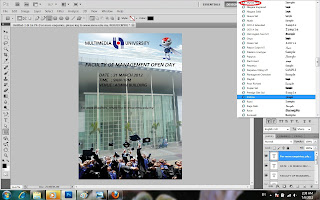 |
| selecting the font type |
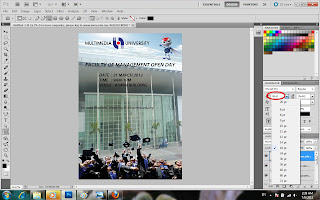 |
| selecting the font size |
After adding in the text, I felt like making the word more attractive. Thus, i clicked on the
"rectangle tool" to draw a box around the words to make it more attractive.
 |
| Drawing a rectangular box | |
|
You must be very worry seeing the black box appear covering all the words you had type. Do not worry. This happened because the colour is not adjusted . To adjusted the colour of the box, move your cursor to the right hand side and look for
"opacity". Opacity adjust the transparency of it. Towards the left side represents transparent and the right side towards the darker one.
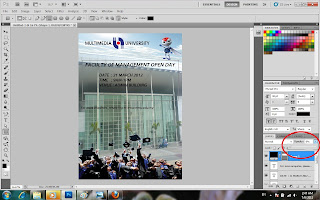 |
| Taaadaaa ! The box becomes transparent :) |
|
|
Let's have an overview of the eWallpaper. It seems like the enquiries is in an inappropriate position. Let's move it to a better place . Move it somewhere towards the bottom part. We shall continue using the
"rectangle tool" . Before we do that, we need to shift the graduates slightly higher so that those words can fit at the bottom. To move graduates, we need to click the
"move tool" and go to the layer named
"graduates". Click on the layer and you can now move the position of the graduates. Observe the changes made.
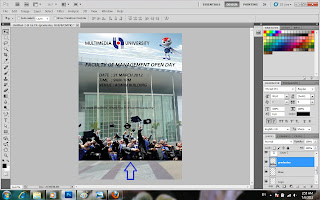 |
| Moving the "graduates" slightly higher up the ground |
|
Now, we can use the "rectangle tool" to draw a box at the bottom.Adjust the "opacity" for your desired transparency.
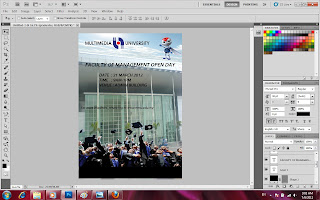 |
| Adding in the black rectangle box. do you see it ? |
|
|
Next, we will drag the enquiries statement to the black box. Go to "move tool" and then click on the layer named "For more enquiries...." in order for you to move the statement. If you would like to change the colour, go to
"Text tool" and highlight the word and then select your preferred colour.
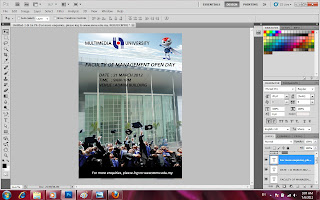 |
| The statement is now at the bottom instead of middle |
|
|
Layering has an advantage. For instance, you do not know whether to add in an extra element. You can actually make use of the
"lock" button. The
"lock" button can help you to preview your image. Now, I'm going to add in another layer into my artwork.
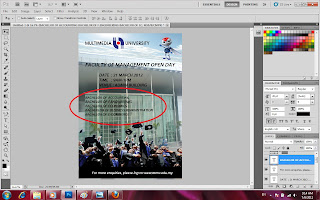 |
| Those circle in red is the newly add-on elements. | |
|
|
After adding in those element, i realized that i didn't like it. Therefore,, I used the
"lock" to hide that layer so that it doesn't appear in the final artwork.
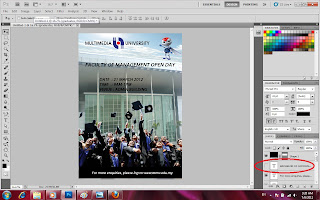 |
| can you see that the last element added is disappear ? The lock is no longer there as well . Look at the red circle ! | |
|
Let's look at my final outcome after layering.
Taaadaaaa :)))
This is my final outcome ! Do comment if you think there are spaces for improvement or there is something wrong or uneasy with the design. If I did something wrong in the explanation or lacking of design, do correct me.
Thank you for your patience reading this super long post .
Have a nice day :D


No comments:
Post a Comment